

Most beginner streaming guides hand you a clean picture and clear audio, then leave you alone on a live broadcast with no script and no plan. That gap is why a lot of new streamers quit by their fifth stream. The picture looked great, the mic sounded fine, and then they lost their train of thought on camera with twelve people watching.
This guide fixes that. It builds your streaming setup in six layers instead of the usual five, with one extra layer that competitor guides skip entirely.
It's written for talking-head streamers: creators, educators, course hosts, business pros doing live demos, podcasters going live, faith-based broadcasters, journalists, and anyone whose job on the stream is to talk. The gear priorities are different when your face and your words are the show.
A live streaming setup is the combined hardware, software, and connectivity that captures your video and audio, encodes it in real time, and sends it to a live platform like YouTube Live, Twitch, or LinkedIn Live.
Talking-head streams (no gameplay, just a person on camera) are now driving the biggest growth in live viewership. According to Stream Hatchet's 2025 Live Streaming Trends Report, Just Chatting viewership on Twitch grew 25% in 2025, with non-gaming content now making up 22% of total Twitch viewership. Add YouTube Live talk shows, LinkedIn Live webinars, and TikTok Live creator chats, and the picture is clear: more beginners are streaming themselves than streaming anything else.
That changes which gear matters most. For a wider view of where live video is heading, see our roundup of the latest live streaming trends and our deeper global live streaming statistics for 2025.
Every working live streaming setup, from a phone-only beginner rig to a six-camera studio, comes down to the same six layers.
Layers 1 through 5 are in every guide on the internet. Layer 6 is the one most beginners discover the hard way, three streams in, when they forget what they meant to say and the chat starts dropping.
The rest of this article walks each layer in order.
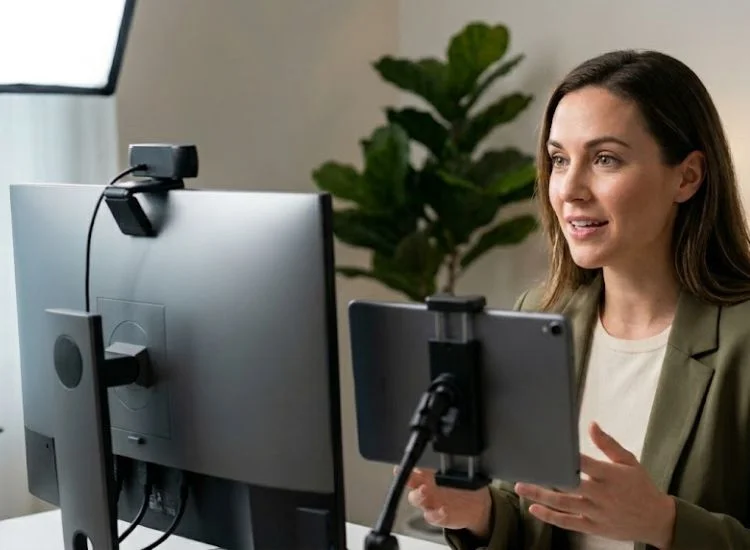
Your camera sets the ceiling for video quality, but it isn't where you should spend first. A clean phone shot beats a high-end DSLR pointed badly.
Three real options for beginners:
One framing rule for all three: put your eyes in the upper third of the frame, with a small amount of headroom above. Keep the lens at eye level. A camera looking up at you flatters almost no one.
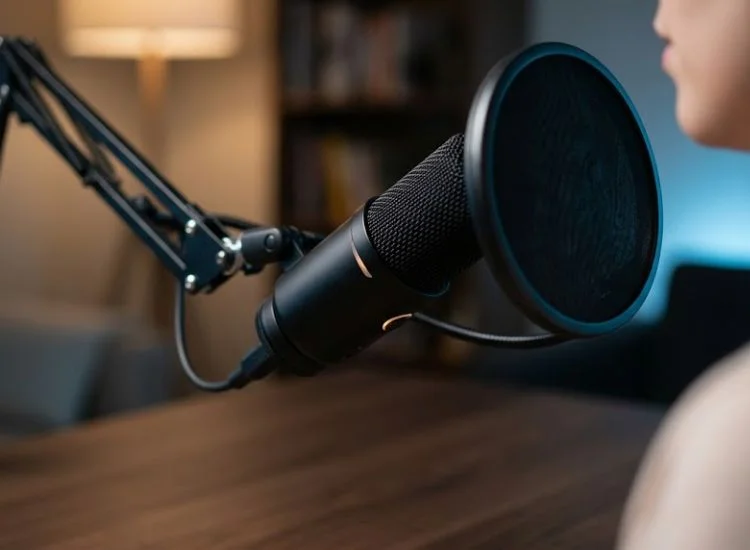
For talking-head streams, audio matters more than video. Viewers will leave for bad audio in seconds. They will tolerate a soft picture for much longer.
Pick one of two paths.
For a deeper look at specific picks at every budget, see our guide to the best microphones for live streaming in 2026.
Two mistakes to avoid on day one:
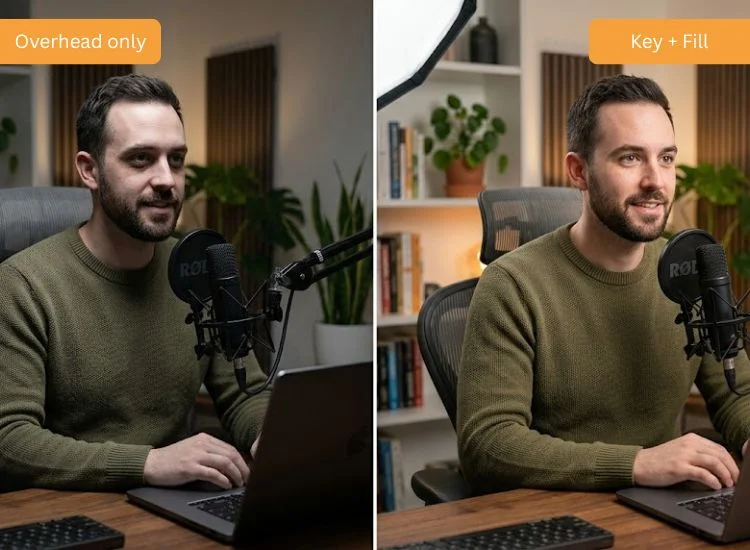
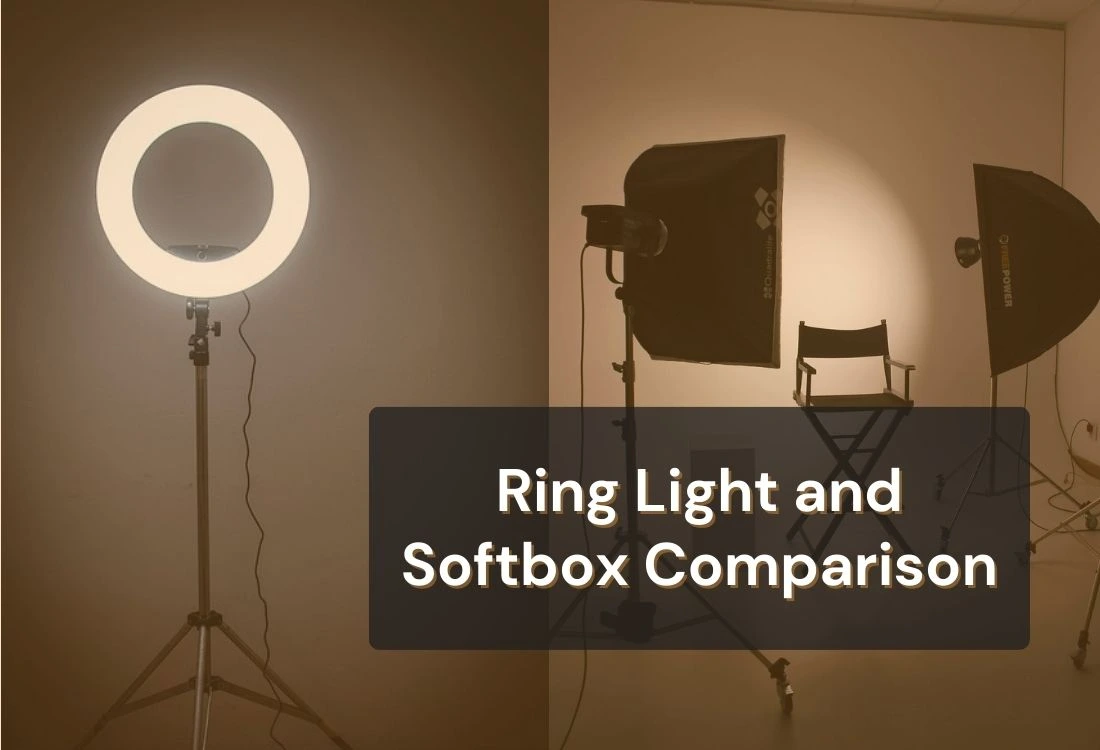
Good lighting fixes more video problems than a better camera ever will.
The standard three-light setup: a key light (your main, off to one side at 45 degrees), a fill light (softer, on the opposite side to lift shadows), and a back light (behind you, separating you from the wall).
You don't need all three to start. A window during the day works as a free key light. A second desk lamp bounced off a white wall works as fill.
When you upgrade, two real choices:
What to avoid: overhead office lighting (it casts shadows under your eyes), and pointing a single hard light straight at your face.
The short answer: For 1080p at 60 fps live streaming, you need a stable upload speed of 10 to 12 Mbps. According to the Twitch broadcast guidelines, the platform caps ingest at 6,000 Kbps for both Affiliates and Partners. Add 30% headroom for network fluctuation, and run on wired ethernet, not Wi-Fi.
Most beginners check their download speed and assume that's enough. It isn't. Streaming is an upload job, and home internet plans are almost always asymmetric (much faster down than up).
Quick bitrate and upload speed reference for live streaming in 2026:
Three internet rules every beginner should follow:
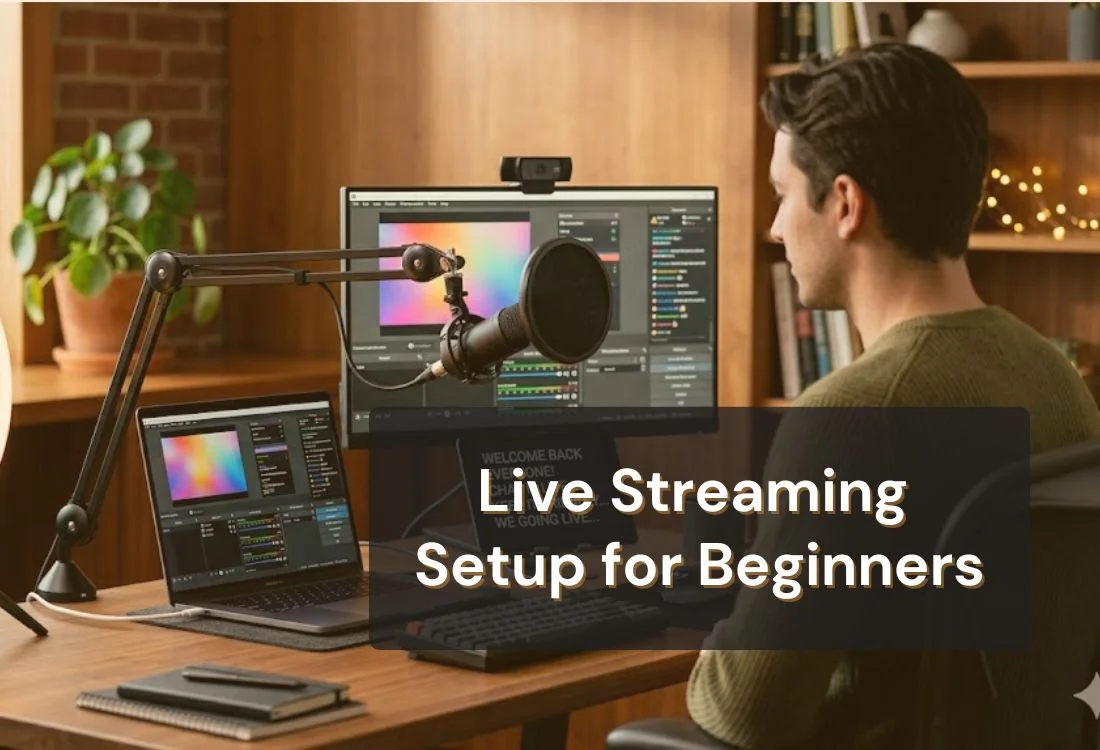
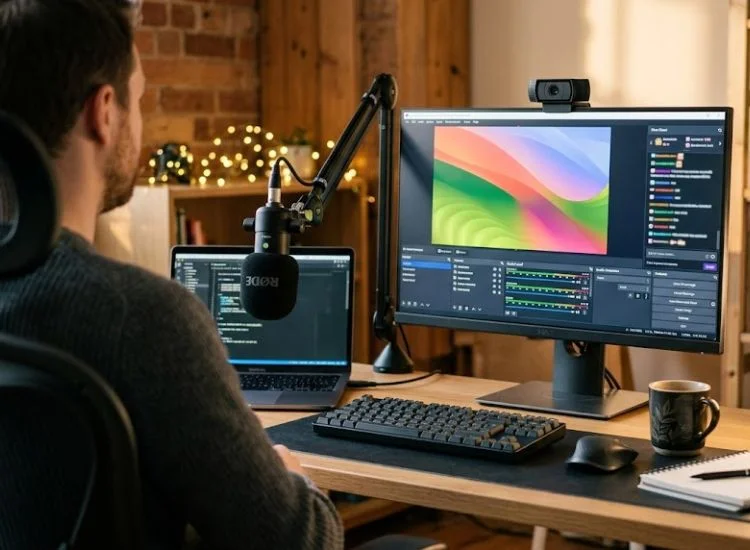
Streaming software takes everything in (camera, mic, slides, browser windows), arranges it into scenes, encodes it, and pushes it to your platform of choice.
Three real options:
For a first stream, install OBS Studio. Add three scenes: a "starting soon" screen, your main on-camera scene, and a "be right back" screen. That's enough to look professional from the first broadcast.
If you stream interviews or panels, the browser-based tools save real time on guest onboarding.
The short answer: Script delivery is the sixth layer of a streaming setup, a system to keep you on message without breaking eye contact with the camera. On live streams there are no second takes, so reading from notes off-screen creates a visible "wandering eye" that erodes viewer trust within seconds.
This is the layer most beginners realize they needed after a few painful streams.
Notes on a sticky? You'll glance down, lose your place, and start saying "um." A second monitor with your outline? Your eyes will drift sideways every ten seconds, and viewers will notice. A printed script in your lap? You'll read down at the page, breaking eye contact for whole sentences.
A teleprompter app solves the eye contact problem by scrolling your script directly under (or over) your camera lens at a controlled pace. You read while looking straight into the camera, and the viewer sees you talking to them.
Here's how to wire it into a streaming setup in under five minutes.
Path A: Alongside your encoder (any platform)
Path B: Direct from Teleprompter.com (iOS and macOS)
If you're streaming from an iPhone, iPad, or Mac, you can skip OBS entirely. Teleprompter.com streams to YouTube, Facebook, Instagram, TikTok, and any RTMPS destination directly:
Full setup details for each platform are in the official how to activate live streaming guide.
This is the moment where streaming setups for talking-head creators diverge from gameplay setups. Gamers don't need a script. Webinar hosts, course creators, sales demo presenters, news streamers, and faith-based broadcasters do. If you run live training sessions, our walkthrough of how to create on-demand webinars quickly covers the script-and-stream workflow end to end.
If your stream is mostly you talking, the script delivery layer is the highest-impact upgrade on this whole list.
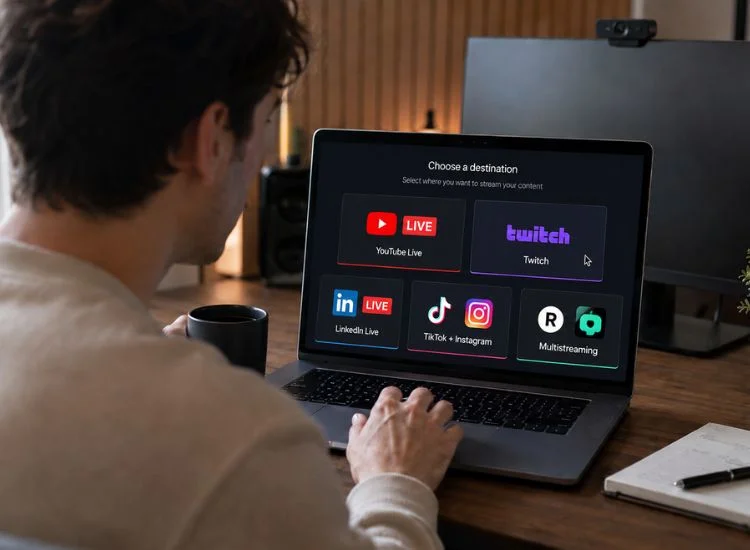
The original platform list on this topic usually runs to twelve. In practice, beginners pick from five.
Other platforms (Kick, Behance, Mixcloud, Amazon Live, X Live) exist and serve niches. Start with one of the five above before adding them.
Once you have the gear, the actual setup takes about thirty minutes the first time, five minutes after that.
Real numbers, not aspirational ones.
The starter tier covers more than people expect. A phone, a clip-on mic, daylight from a window, and OBS will produce a stream most viewers can't tell apart from a $700 setup.
For ideas on the rest of the room, our guide on building a home recording studio on a budget covers acoustic treatment, desk setup, and the small fixes that punch above their price.
A reliable live streaming setup is built in layers, not bought in one shopping cart. Camera, audio, lighting, internet, software, and script delivery. Five of those layers are in every beginner guide on the internet. The sixth, script delivery, is what separates streams that grow from streams that stall after the fifth episode.
If your stream is mostly you on camera talking, the highest-impact upgrade you can make this week isn't a better webcam. It's a system that keeps your words flowing without making you stare down at notes.
Once your stack is in place, the next layer is delivery. Our essential live streaming tips cover what to do on camera once the gear is sorted.
Going live leaves no room for forgotten lines. Load your script into Teleprompter.com, set your scroll speed, and read naturally while looking straight into the camera. Sign up and get started for free.
A basic live streaming setup needs five pieces of gear and one piece of software: a camera (webcam or phone), a microphone (USB is fine), a light source (a window works), a stable internet connection with at least 8 Mbps upload, and a streaming app like OBS Studio. Add a teleprompter for talking-head streams where you read a script on camera.
A beginner live streaming setup costs between $0 and $150 if you use a phone or built-in webcam with OBS Studio and Teleprompter.com's free plan. A mid-tier setup with a dedicated webcam, USB mic, and ring light runs $300 to $700. Pro setups with a DSLR, XLR mic, and proper lighting start around $1,500.
For 1080p at 60 fps live streaming, you need a stable upload speed of 10 to 12 Mbps. For 1080p at 30 fps, 7 Mbps is enough. Twitch caps ingest at 6,000 Kbps for both Affiliates and Partners, so streaming above that wastes bandwidth and risks rejection. Use wired ethernet for stability.
OBS Studio is better for beginners who want full control and free, open-source software. Streamlabs is better for beginners who want a faster setup with built-in alerts and overlays. Streamlabs is built on OBS, so anything one can do, the other can do with more or less effort.
Yes, you can live stream from a phone using YouTube Live, TikTok Live, Instagram Live, or X Live directly through their apps. For more control (multiple scenes, overlays, a script), use Streamlabs Mobile or pair your phone with a desktop encoder via a capture card.
Use a teleprompter app like Teleprompter.com on a screen positioned directly below your camera lens. Paste your script, set the scroll speed to match your speaking pace, and read while looking straight into the camera. Your eyes stay on the lens, and viewers see you speaking to them.
Yes. On iOS and macOS, Teleprompter.com streams directly to YouTube, Facebook, Instagram, TikTok, and any platform that supports RTMPS (such as LinkedIn Live, Twitch, or Vimeo). Open your script, tap the LIVE button, choose your platform, and broadcast with the script scrolling inside the camera view. No separate encoder needed for solo talking-head streams.
YouTube Live is the best platform for most beginners. It has the largest discoverability via YouTube search, archives streams automatically as regular videos, and supports long-form content. Twitch is better for chat-driven and gaming streams. LinkedIn Live is better for B2B and professional content.