

Professional-looking iPhone video comes down to five controllable variables: camera settings, light, audio, stabilization, and delivery. Get those right, and your footage looks studio-shot even without a full camera rig, solving the "why does my video look amateur" problem most creators actually have.
Your camera settings decide how much room you have to fix things later. Get them right at the start and everything downstream gets easier.
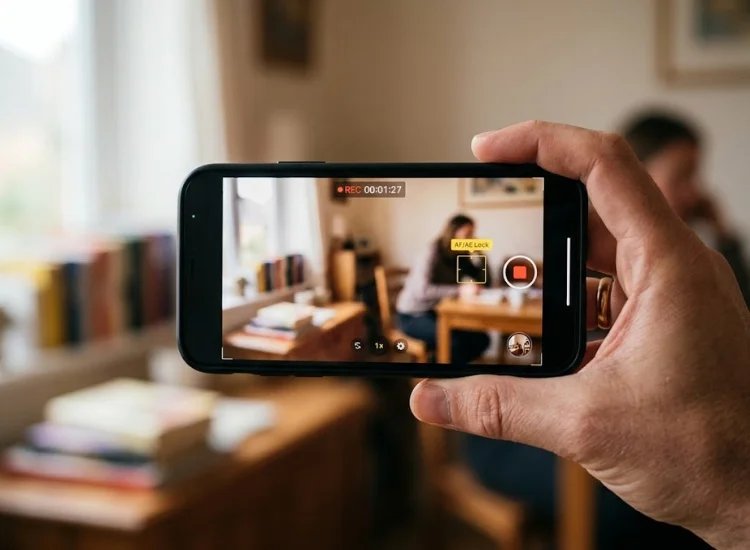
Auto-exposure and autofocus adjust constantly while you're recording, which is exactly what you don't want mid-take. Tap and hold on your subject's face until you see "AE/AF LOCK" appear at the top of the screen, then drag the sun icon up or down to fine-tune brightness. This locks both settings so your face doesn't randomly blow out or blur every time you shift position or the light in the room changes.
Cinematic mode adds an automatic, adjustable depth-of-field effect that blurs your background, which reads as "professional" instantly, but it also softens edges and can misjudge focus on fast movement, so it's best for slower, deliberate talking-head shots.
Standard video mode is the safer default for most creator content since it gives you full control without extra processing. If your iPhone supports Log or ProRes and you plan to color-grade in post, shoot in that format, but only if you're actually editing afterward. Log footage looks flat and desaturated straight out of camera and needs grading to look finished.
Match your settings to where the video lands, not to the highest number available. YouTube long-form: 4K at 24 or 30fps. Instagram Reels, TikTok, YouTube Shorts: 4K vertical (9:16) at 30fps is the safe default; 60fps only if you need smooth slow motion. Higher frame rates eat storage fast, so don't default to 4K/60fps unless you have a specific reason to.

Lighting has a bigger impact on perceived production value than camera settings, and you don't need a lighting kit to get it right.
Position yourself facing a window, not with it behind you. Indirect daylight through a window is soft, even, and flattering in a way that's genuinely hard to replicate with cheap LED panels. Midday sun through sheer curtains is close to ideal; direct harsh sun creates unflattering shadows, so shoot earlier or later in the day, or diffuse it with a thin curtain.
If you're shooting somewhere without good window light, a basic three-point setup still works with budget gear: one key light in front at a 45-degree angle, one fill light on the opposite side (even a cheap LED panel or a white foam board bouncing the key light back), and one light behind you pointed at your background to separate you from it. You don't need matching, expensive lights. Consistency in color temperature matters more than the price of the gear.
Shooting with a window or bright light source behind you. Your iPhone's auto-exposure will correctly expose for that bright background and turn your face into a silhouette. If your subject looks dark and the background looks fine, that's the fix: turn around, or turn the light source around.
If you only fix one thing on this list, fix audio. It's the variable viewers notice fastest and forgive least.
Your iPhone's built-in microphone is omnidirectional and tuned to pick up whatever is closest, which usually means it captures room echo, HVAC noise, and background chatter along with your voice. Poor audio quality is consistently cited as one of the top reasons viewers disengage from video content or drop out of a call entirely, even when the visuals are strong.
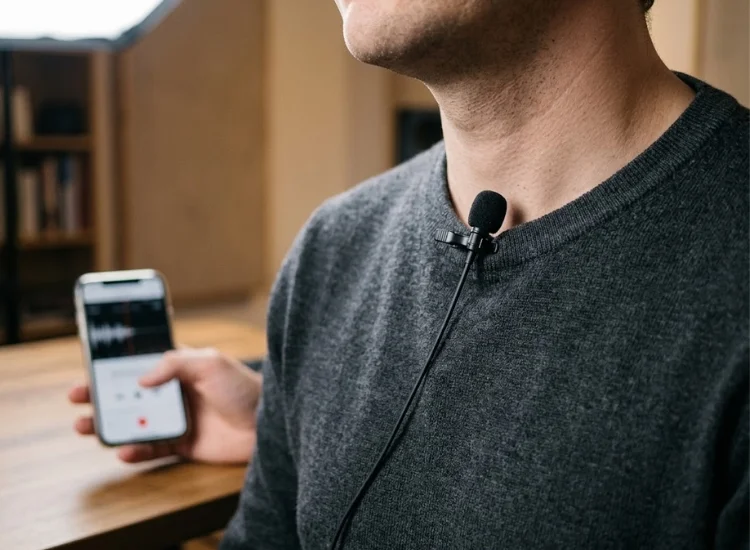
For most solo creators shooting talking-head content, a clip-on lav mic that plugs into the Lightning or USB-C port (or connects via Bluetooth) is the simplest upgrade you can make. It's a bigger jump in perceived quality than any camera or lighting change on this list.
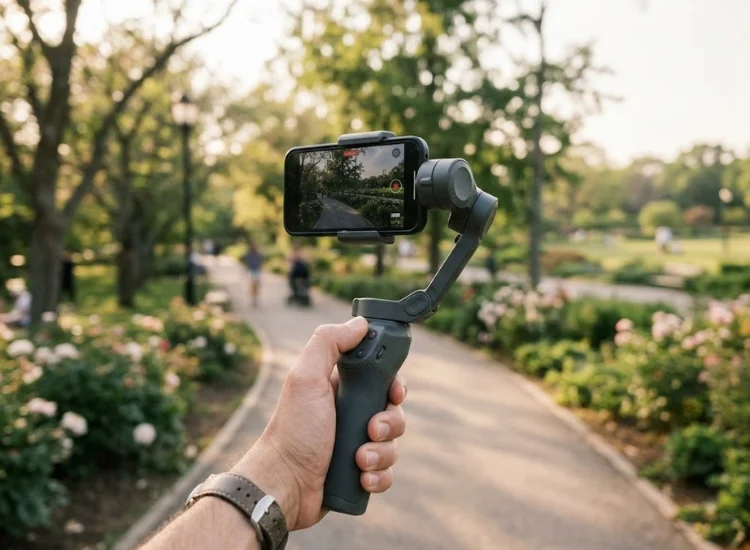
Shaky footage reads as "amateur" faster than almost anything else, even when everything else about the shot is right.
If you're shooting static talking-head content from a fixed position, a tripod solves stabilization completely and costs less than any other option. There's no reason to buy a gimbal if your camera never moves.
If you're walking while filming, following a subject, or shooting from a moving vehicle or bike, a gimbal is the difference between usable and unusable footage. For a full breakdown of specific models across price points, see the best smartphone gimbals for iPhone and Android guide.
Position your eyes roughly one-third of the way down the frame, not dead center. Center-framing is what makes footage read as a casual selfie rather than a produced shot. Your eye-line should point directly at the lens, not slightly above or below it, which is a common problem when your phone is propped at the wrong height.
Leave a small gap above your head, not a large one. Too much headroom makes the shot feel empty; too little feels cramped. For most talking-head content, frame from mid-chest up, and position the camera at eye level rather than looking up or down at you, which flatters almost no one.
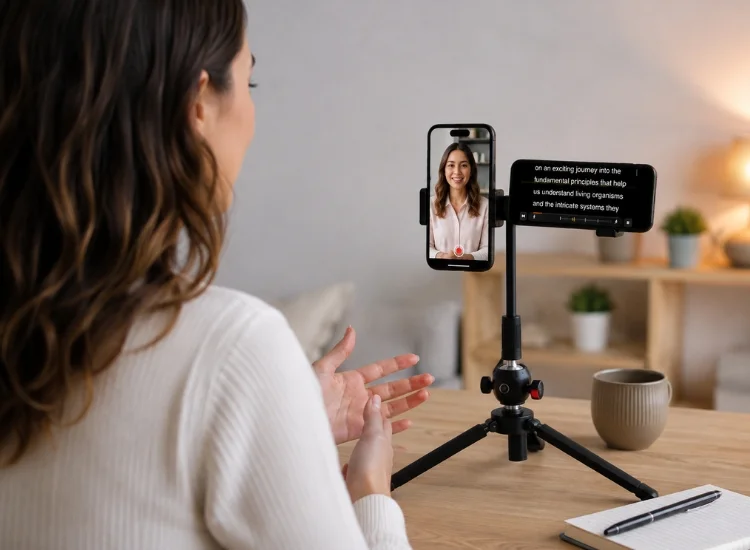
Settings, lighting, audio, stabilization, framing. You can get every one of those right, and your video will still look off, because your eyes are darting to a piece of paper or you're fumbling to remember your next line. That's not a gear problem. It comes down to delivery, and a teleprompter is what actually fixes it.
Looking away from the lens to consult notes immediately signals hesitation to your viewers. By placing your script right next to the camera lens, a teleprompter ensures you maintain constant eye contact and keep the audience engaged.
Teleprompter.com app does this on your iPhone. VoiceGlide scrolls the script as you talk, so if you slow down or pause, it waits with you instead of racing ahead. You're not chasing a fixed scroll speed or losing your place. And since the app records directly at up to 4K with no watermark on Pro, you don't need to juggle a separate camera app and prompter app during the shoot.
One user summed it up well after switching: it made them sound like they actually knew what they were talking about, instead of obviously reading off a script.
For a side-by-side look at how Teleprompter.com compares to other iPhone options, check the best teleprompter apps for iPhone roundup. If you want more setup fixes beyond delivery, the teleprompter dos and don'ts for professional video guide covers the mistakes people make most often.
Everything above works with just your phone. But if you're shooting daily, working with a team, or producing for clients, there's a point where dedicated hardware starts paying for itself: a proper phone mount with beam-splitter glass, a dedicated teleprompter rig for interviews, or a second monitor for a fixed studio setup. If you're weighing whether that jump makes sense yet, teleprompter devices for every budget breaks down options from free app-based setups to full broadcast rigs.
Once your footage looks professional, the next lever worth working on is what happens in the first three seconds. The guide to hooks for video content covers that side of the equation.
Lock exposure and focus (AE/AF lock) before recording, shoot in 4K at 24 or 30fps for most platforms, and use Cinematic mode only for slower, deliberate talking-head shots where the background blur adds value.
No. A window used as your key light, with you facing it rather than having it behind you, produces better results than most budget lighting kits. External lights help in rooms with poor window access, but they're not required.
A clip-on lavalier mic is the simplest upgrade for solo talking-head content. Shotgun mics work better for wider shots or multiple people in frame. Either beats your iPhone's built-in mic significantly.
Only if you're moving while filming. Static talking-head content is fully solved by a tripod. Gimbals matter when you're walking, following a subject, or shooting from a moving vehicle.
4K is better for most professional video because it gives you more resolution to crop, stabilize, or reframe in editing without losing quality, and it holds up better on larger screens. 1080p is a reasonable choice if you're tight on storage or shooting content that will only ever be viewed on mobile, since the visual difference is harder to notice at that size. For YouTube, courses, or anything you might repurpose later, shoot in 4K.
Use a teleprompter positioned right next to your camera lens instead of notes off to the side. Voice-activated scrolling, like Teleprompter.com's VoiceGlide mode, follows your natural pace so you're not fighting a fixed speed while trying to sound conversational.


.png)


.png)