

Glancing down at your notes during a Zoom call reads as disengagement faster than it does in person. The camera is closer to your face than any audience member would ever sit, and gallery view puts your expression in front of everyone for the whole meeting. A teleprompter solves the eye-contact problem, but only if you set it up the right way.
This guide walks through how to use a teleprompter on Zoom with three different setups, when to apply each, and the small things that separate a polished presentation from one where everyone can tell you are reading. We also cover the screen-sharing problem, Zoom's own settings that compound with teleprompter use, and the delivery techniques that make scripted Zoom calls feel like conversation.

In a physical room, a quick glance at notes feels natural. Your audience is several feet away, peripheral vision fills in the gaps, and small head movements register as normal speaker behavior. Zoom changes the math. Your camera is inches from your face, every participant is essentially at "intimate" distance on their screen, and any look away from the lens gets amplified by the framing.
The eye-line geometry matters more than people realize. At Teleprompter.com, we recommend the 15-degree eye-line rule: your script should sit within roughly 15 degrees of the camera lens so that glancing at it still reads as natural eye contact. Anything wider, and the viewer registers a clear "look-away" rather than presence. Every setup method in this guide is designed to keep you inside that 15-degree window.
There is no single correct setup. The right method depends on your hardware, your meeting type, and whether you need to share your screen. Here is the quick comparison.
If you want a deeper comparison of which apps work best with each method, you can compare the top five teleprompter apps for Zoom.
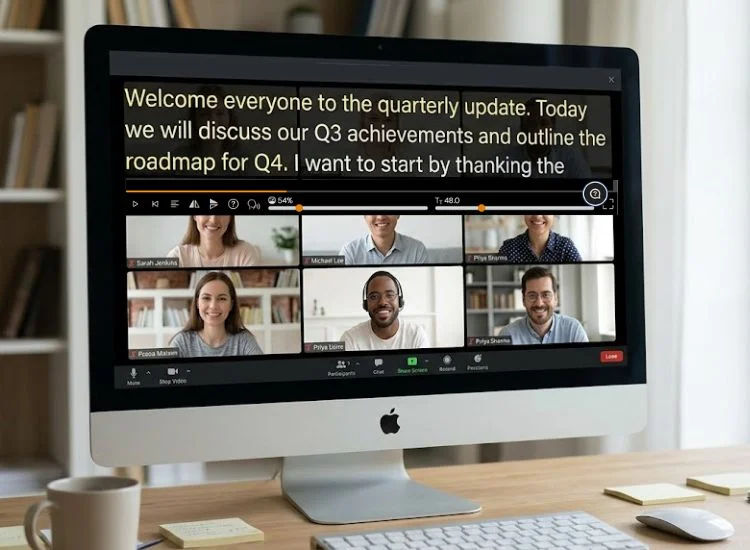
This is the fastest setup and works with any laptop or desktop. You position the prompter window directly under your webcam, open Zoom behind it, and start scrolling. No second monitor, no extra device, nothing to mount.
The experience is best on Mac because the dedicated Teleprompter.com macOS app includes two features built specifically for overlay use:
Windows and browser users get the same core workflow without those two features, but the workflow still works reliably for most calls.
Step-by-step (macOS app, recommended):
For the full walkthrough, see our step-by-step Zoom setup guide for macOS.
Step-by-step (browser, any operating system):
Best for: 1:1 calls, internal team meetings, anything where you are not sharing your screen.
Watch out for: Putting the prompter at the bottom of the screen. That breaks the 15-degree rule and forces an obvious eye drop. Always position it at the top, right under the camera.
That setup speed shows up consistently in user reviews. One App Store reviewer who runs the overlay method for Zoom interviews captured it cleanly:
If you have a dual-monitor setup, this method gives you the cleanest result. Zoom runs full-screen on Screen 1 with your participants visible at normal size. Teleprompter.com runs on Screen 2, which you position directly below your camera.
Step-by-step:
Best for: Webinars, sales presentations, all-hands, and any format where you need to look composed for an extended period. If you are unsure whether your event is a webinar or a working meeting, the format shapes the setup. Our breakdown of the difference between a webinar and a meeting explains when each format applies.
Watch out for: Letting Screen 2 sit too far below the camera. If your script is more than a few inches below the lens, your eyes track noticeably downward. Raise Screen 2 with a stand or stacked books until the top line of the script aligns with the camera's horizontal axis.
This is the pro setup. It also happens to be the only method that works if you are using an external camera (DSLR, mirrorless, or a dedicated webcam mounted on a tripod) instead of your laptop's built-in camera.
Step-by-step:
Best for: Content creators, podcasters, journalists, or anyone running a Zoom setup with a real camera instead of a laptop webcam.
Watch out for: Tablet glare. Reduce screen brightness to roughly 60% and tilt the device slightly to avoid the camera picking up the reflection in your glasses or eyes.
Going further with a beam-splitter rig.
Some content creators and broadcasters pair Teleprompter.com on a tablet or phone with a beam-splitter teleprompter mounted in front of the camera. The hardware does one job: it reflects the script onto a glass panel directly over the lens so you read while looking straight at the camera.
The script itself still has to come from somewhere, which is where the app sits. The same 15-degree rule and scroll-speed tips apply, and a beam-splitter rig is overkill for most Zoom calls. For studio-grade setups, it earns its place.
You need to read a script and share your screen on Zoom. The overlay method breaks the moment you hit Share Screen, because the prompter either gets shared along with your slides or gets buried behind them. You have three ways to solve this.
Decide which option fits before the meeting starts. Switching mid-call rarely goes smoothly.
A handful of Zoom settings compound with teleprompter use. Turn these on before your next call.
Zoom's Immersive View can cause overlay positioning to shift unpredictably. If you rely on Method 1, keep Immersive View turned off.
The setup is half the work. The other half is delivery. These techniques separate readers who sound natural from those who sound rehearsed.
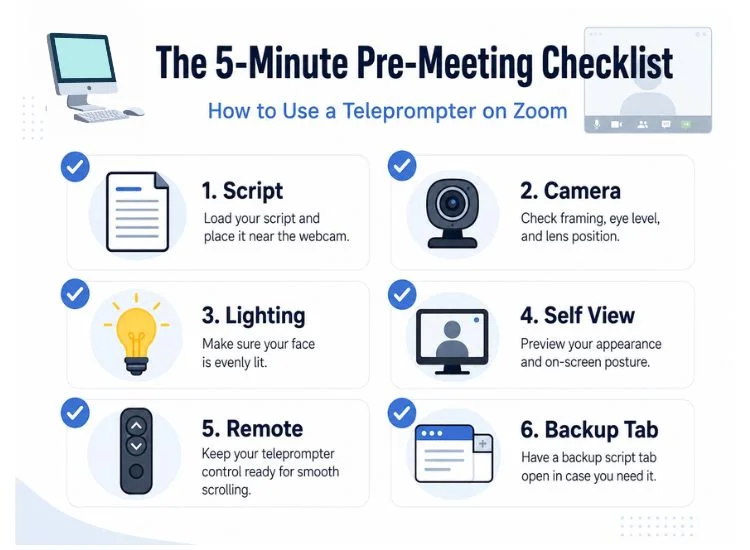
Run through this five minutes before your Zoom call starts.
Skipping the test run is the most common mistake. A 60-second dry run catches problems that would derail a real call.
Avoid these and you will be in the top 10% of Zoom presenters.
For more on the broader skill set, our guide to broader Zoom presentation skills covers slide design, pacing, and audience engagement beyond the teleprompter itself.
A teleprompter on Zoom is not about reading words off a screen. It is about freeing your attention to focus on the person on the other side of the lens. With the script handled, you can listen better, react in real time, and bring presence to a format that usually drains it.
Learning how to use a teleprompter on Zoom comes down to picking the right setup for the call. Overlay for casual meetings, second screen for formal presentations, companion device for serious camera setups.
All three keep you inside the 15-degree eye-line rule. All three work with Teleprompter.com on every device you already own. To go further on the delivery side, our guide on how to elevate your remote presentation impact covers pacing, posture, and engagement techniques that pair with the setup methods above.
If Zoom is a regular part of your work, it's worth picking a plan that matches how you use it. The free plan handles most Zoom setups end to end, and upgrading to a paid tier unlocks advanced controls and team features when you need them. See all plans and choose the one that fits how you work.
Yes. With the right setup, a teleprompter on Zoom is invisible to participants. Position the script within 15 degrees of your camera lens, hide your self-view, and match the scroll speed to your natural speaking pace. Done correctly, viewers see steady eye contact and natural delivery, not a script read.
No. Zoom does not include a native teleprompter feature. You need a separate teleprompter app or web tool such as Teleprompter.com, which runs in your browser or on your phone alongside your Zoom call.
For live Zoom calls, VoiceGlide works best because it matches your actual speaking pace rather than a fixed speed. Manual scroll requires a free hand, which limits gestures. Fixed-speed scroll often creates the rushed delivery that makes teleprompter use obvious.
Yes. Open Teleprompter.com on iOS, Android, or in mobile Safari or Chrome. Mount your phone next to your camera at eye level so the script stays within 15 degrees of the lens. This setup works especially well for calls with an external webcam or DSLR.
Match your natural conversational speaking pace, which for most people is 130 to 150 words per minute. Live Zoom calls move slower than recorded video, so reduce your scroll speed by 10 to 15% compared to your usual rate. VoiceGlide adapts to your real pace automatically, pausing when you pause. To dial in your exact pace, paste your script into the Script Timer tool and see your reading time at different speeds.


.png)