

If you’re filming YouTube videos or recording an online course in 2026, you’re competing with a lot of “good enough” content. Viewers don’t need Hollywood production, but they do expect clear audio, steady framing, and delivery that feels confident. The best teleprompter setup helps you hit those basics every time, even when you’re filming solo.
This guide walks you through practical teleprompter builds, a script workflow that sounds natural, and setup fixes that prevent the usual problems like glare, darting eyes, and shaky shots. You’ll also see what matters most for content creators: speed, repeatability, and keeping your eye line close to the lens.
Creators are producing more video than ever, and audiences are watching at a scale that changes what “good” looks like. YouTube has shared that people spend a billion hours every day watching videos on the platform. That’s a massive opportunity, but it also means viewers have endless choices. When someone can click away in a second, clear structure and confident delivery become a real advantage, not a nice-to-have.
At the same time, the pace of creation is faster. Many YouTubers batch multiple videos in a single session. Course creators record lessons back-to-back. In those workflows, “winging it” gets expensive because every restart costs time, energy, and consistency. A solid teleprompter workflow helps you stay on-message, keep your tone steady, and record cleaner takes without relying on perfect memory.
There’s also a practical shift in how people consume video. Captions and accessibility are now part of the baseline viewing experience, not an extra. Wistia’s 2025 State of Video findings report that caption use has increased 572% since 2021, making captions the most widely adopted video accessibility feature among marketers. For anyone looking to apply this more intentionally in their production process, a video accessibility checklist that improves captions, readability, and inclusive viewing across different content formats can help turn accessibility from an afterthought into a structured part of content creation.
The takeaway is simple: audiences want content that’s easier to follow in more contexts, on mobile, in noisy spaces, or with sound off. A teleprompter workflow supports that by helping you speak with cleaner phrasing, stronger pacing, and fewer rambles, so your content is easier to caption, edit, and repurpose.
Ultimately, a teleprompter setup isn’t just a piece of gear. It’s a repeatable system that makes your communication sharper. And in 2026, sharp communication is a competitive edge.
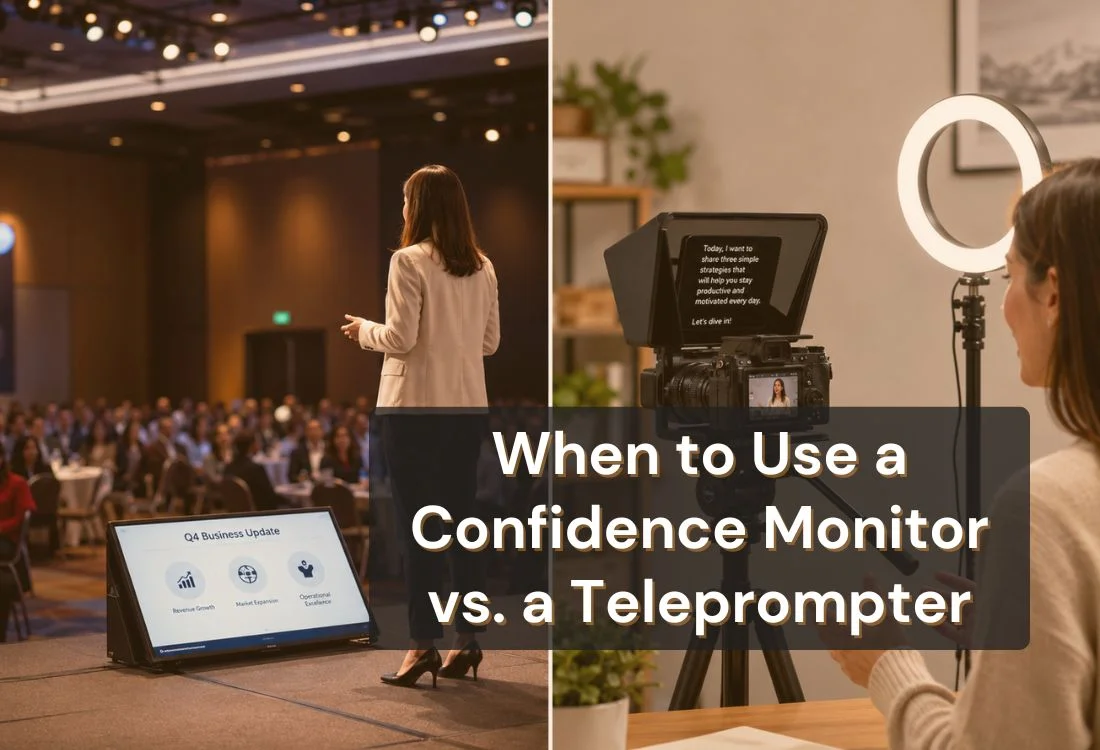
The ideal teleprompter setup isn’t “the most expensive teleprompter.” It’s a system that matches how you film and can be rebuilt quickly. In 2026, “best” usually means you can press record in minutes, your lighting doesn’t reflect off the glass, your audio sounds clean, and you don’t look like you’re reading.
A reliable setup also protects your energy. If you’ve ever recorded a course module, you know the mental load adds up: remembering your outline, staying on time, keeping your tone upbeat, and delivering the same clarity on take five as you did on take one. With a strong teleprompter setup, you don’t rely on memory under pressure. You rely on a workflow.
A teleprompter rig works when the whole chain is solid. The best teleprompter setup usually comes down to six pieces working together:
Start with the basics: a stable mount and clean audio. Viewers can overlook less-than-perfect video, but they won’t tolerate muffled speech, uneven volume, or distracting echo. Then address lighting and glare, because teleprompter glass is unforgiving when your key light is aimed the wrong way.
Finally, dial in readability and eye line. Most creators struggle not because they “need more confidence,” but because text is too small, scroll speed is too fast, or margin settings pull the eyes away from the lens. When you fix those, delivery improves fast without changing your personality on camera.
Teleprompter hardware usually falls into three formats. The best teleprompter creator setup picks the format that fits your camera and filming style, then keeps it simple.
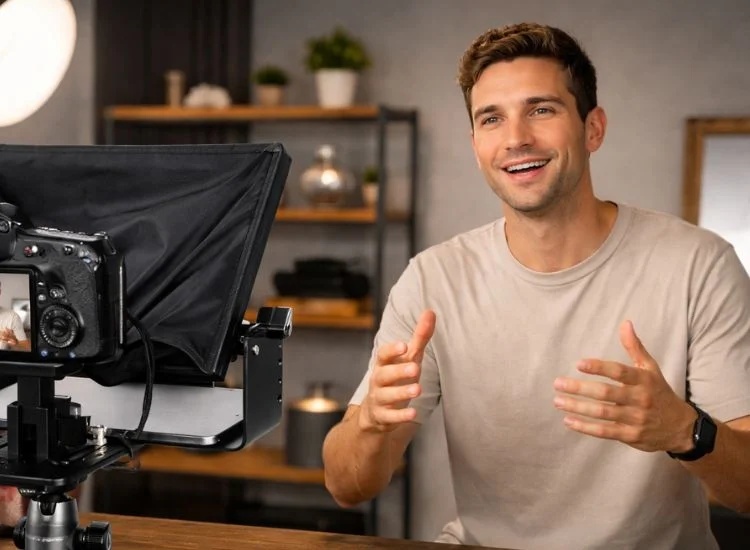
If you film YouTube talking-head content, product walkthroughs, or high-quality A-roll, camera-mounted teleprompters are a strong fit. Your eyes stay close to the lens, and you can keep framing consistently across videos. That consistency matters more than people think, especially when you’re trying to build trust as an educator or creator.
The trade-off is setup discipline. You need a stable tripod/head and lighting that won’t bounce into the glass. But once you find the sweet spot (lens height, distance, light angle), this can become your default “record day” setup.
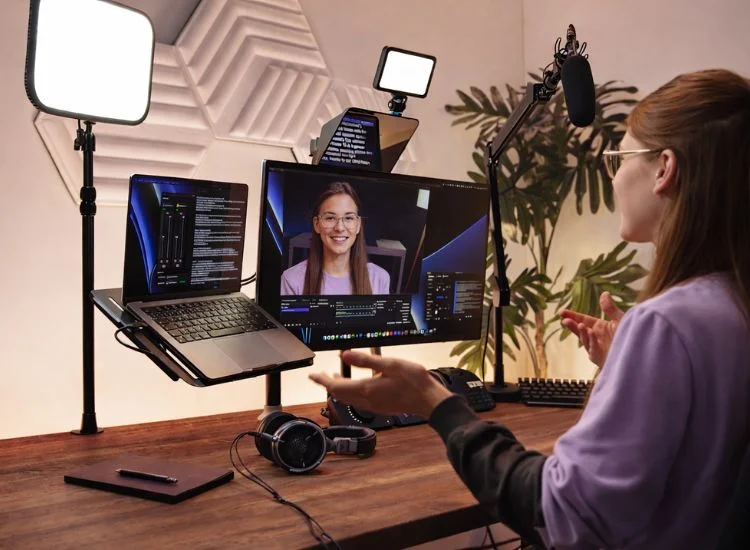
For online course creators, desk teleprompter setups are often more comfortable for long sessions. If you teach with slides, screen share, or demos, it helps to keep your script near your camera without leaning forward or looking down.
The key is camera placement. The best course videos feel like you’re speaking to one person. If your webcam is too low or too far off-center, it can feel like you’re talking past the viewer. A desk teleprompter helps keep your eye line centered while you teach.
If your content mix includes shorts, quick explainers, or travel filming, portable phone teleprompters can be the best teleprompter setup for consistency on the go. It’s the easiest way to keep delivery tight without memorizing your lines.
The main risk is screen size. Small text creates fast reading. Fast reading creates a rushed tone. The fix is simple: larger font, slower scroll, and scripts written for speech.
If YouTube is your main channel, your setup needs to support consistency. Not just video quality, but consistent delivery. YouTube viewers reward clarity. When your hook is clean, pacing feels steady, and delivery stays confident, your content feels easier to watch.
For most creators, the best teleprompter setup for YouTube is built around a repeatable A-roll. You’re not trying to reinvent your camera position every shoot. You’re trying to make “record day” predictable.
What usually matters most:
If you’re trying to batch faster, the biggest win is a repeatable script and pacing routine. Once you have that, filming days feel lighter.
A DSLR or mirrorless setup gives you flexibility, but it also adds a few moving parts that can create friction. Your teleprompter mount, lens height, tripod stability, and lighting angle all have to work together. When they do, this can be one of the most comfortable teleprompter workflows for long-form YouTube or high-quality course A-roll.
Two things are worth getting right early: lens positioning and glare control. Lens height is the foundation for a natural eye line. Glare control is what keeps the setup usable, especially if you film at night with artificial lights.
Start with the lens at or slightly above eye level. It’s easier to look present when you aren’t looking down. Then lock distance and framing so your face stays consistent across takes and across weeks.
A practical tip: once you find a framing you like, mark your tripod position on the floor. That one habit saves time every recording day.
Teleprompter glass is sensitive to lighting direction. If your key light aims into the glass, you’ll see reflections. Small adjustments can fix most glare without buying anything new:
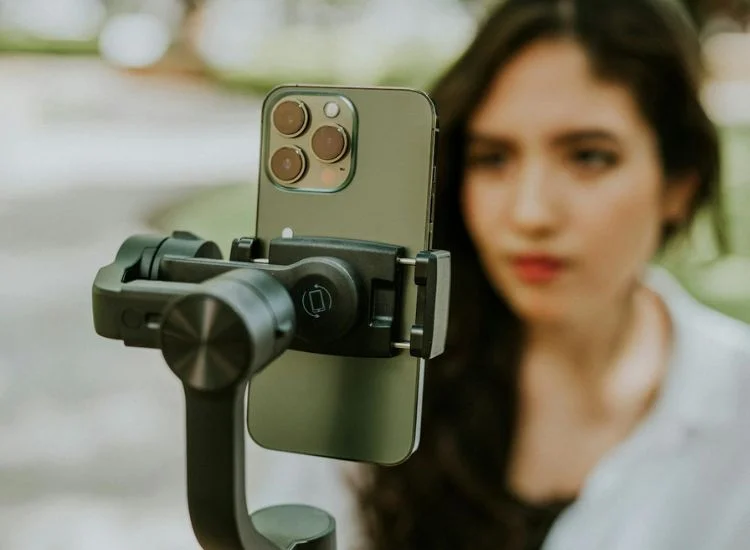
An iPhone setup can look surprisingly professional, but only if you treat stability and readability as non-negotiable. Phones are light, which is great for portability, but it also makes them easier to bump or shake.
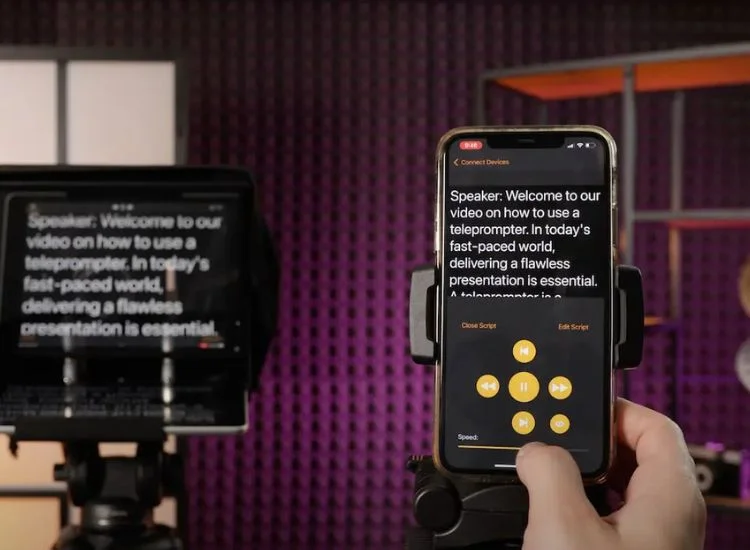
The most common iPhone teleprompter mistake is tiny text. It forces speed-reading, which makes delivery sound rushed. Better results usually come from larger text, slower scroll, and scripts written for speech.
For an iPhone setup, stability comes first. Use a solid tripod (or a sturdy desk mount), tighten plates, and keep cables secured. If you film standing, keep the phone at eye level so you don’t drift into a downward gaze.
If you’re close to the lens, increase the font size. If you’re farther back, increase it again. That sounds obvious, but it’s where many creators lose natural delivery. Bigger text reduces eye darting and helps you hold a steady pace.
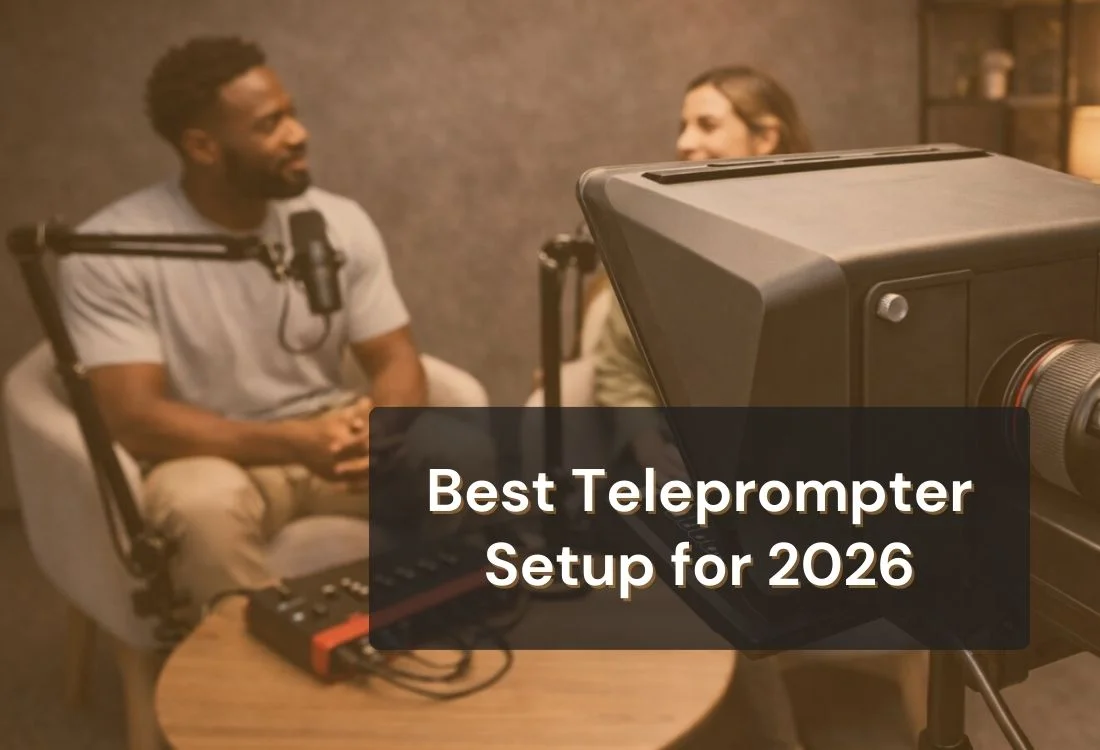
Below are three setups that cover most creator workflows in 2026. Each one can be “best” depending on your output.
This setup is for creators who want less friction. You can set it up quickly, film, and move on without turning production into a weekend project.
In practice, the teleprompter setup at this level is the one you’ll use every day. That means lightweight gear, minimal cables, and simple lighting. A single soft key light at a 45° angle (or clean window light) is often enough if your audio is good.
Use this setup when you’re filming short tutorials, daily content, or direct-to-camera updates. Keep scripts short, record in sections, and prioritize pacing over perfection.
Helpful add-ons (only if needed):
This is the sweet spot for most YouTubers: stable framing, comfortable readability, and a workflow that doesn’t change every week.
The biggest upgrade here isn’t another gadget. It’s repeatability. Mark your tripod position. Save your teleprompter app settings. Keep lighting placement consistent. When you remove the setup guessing game, you record faster and sound more relaxed.
If you publish weekly, the best teleprompter setup is the one that helps you film reliably even when you’re tired, busy, or filming at night.
What to standardize:
Course creators benefit from comfort and structure. Your setup should make it easy to teach for 10–30 minutes without posture collapsing or delivery drifting.
Wistia’s data is a helpful reminder that educational and how-to videos hold attention well: viewers watched over 50% of how-to videos between 1 and 30 minutes on average. That doesn’t mean you should ramble. It means longer teaching content can work when it’s structured and clear.
For course recording, the best teleprompter setup is one that supports chunked teaching: intro, lesson steps, example, recap. You don’t need one perfect 20-minute take. You need clean segments you can edit quickly.
Course-friendly workflow tip: add on-screen chapter headings to your script so you always know where you are, even if you pause.
If you’re using Neewer teleprompter hardware, compatibility is mostly about how your workflow runs once everything is mounted. The hardware holds your phone or tablet and reflects your script onto the glass. Teleprompter.com handles the script side of the setup so you can control text formatting, pacing, and eye line during recording.
Before you record, confirm the fundamentals. Most teleprompter issues come from fit, alignment, or settings, so it’s worth checking these once and saving your “default” setup.
Compatibility checklist before you hit record:
Once your hardware is stable, match your workflow to what you’re filming:
If you want a tiered reference (starter, pro, studio) to compare common approaches, you can check the Neewer creator setup guide.
A teleprompter doesn’t make you sound stiff. Scripts do. If your text reads like an article, delivery will feel “read.” The best teleprompter setup includes a spoken-first script workflow so you can stay conversational while keeping your eyes close to the lens.
Write for the ear: shorter sentences, contractions, and one idea per line. A structure that works for YouTube and course lessons is Hook → Promise → Steps → Example → Wrap. It keeps you on track without sounding rehearsed.
Format matters as much as wording. Use line breaks where you’d naturally pause, and put transitions on their own line so you don’t rush.
Quick tweaks that make a big difference:
Once the script sounds like speech, your teleprompter app settings can keep everything looking natural on camera.
If blank-page scripting is what slows you down, an AI script generator can help you get a solid outline and first draft in place faster, so you can spend your recording time on delivery instead of starting from scratch:
The teleprompter app is where your setup starts to feel polished. Hardware gives you the glass and mounting, but the app controls the details viewers notice: readable text, steady pacing, and an eye line that stays close to the lens.
For the best teleprompter setup, prioritize features that help you move quickly and stay consistent across shoots, especially if you’re batching YouTube videos or recording course modules back to back.
Teleprompter.com supports these workflow essentials: script formatting, pacing control, and margin adjustments that help keep your eye line natural. If you want to test this workflow in your next recording session, you can sign up with Teleprompter.com.
Teleprompter glass will expose lighting mistakes quickly. If you aim a bright light straight at the glass, you’ll get reflections. If your key light is too low, you’ll get harsh shadows. The fix isn’t complicated, but it does require intention.
Place your key light slightly above eye level, angle it down toward your face, and move it wider to reduce direct reflection. If glare shows up, make small changes: move the light a few inches, raise it slightly, or reduce brightness and bring the light closer for softer output.
Audio is your fastest win. If you’re building your teleprompter setup on a budget, prioritize a decent mic and a less echoey room before upgrading your camera. Clean audio makes your video feel more credible, more professional, and easier to follow.
Quick audio improvements:
If you nail a take but end up with distracting room noise, you don’t always have to re-record. You can run the clip through a background-noise removal tool to clean up the audio and keep the performance you already captured.
The goal is to make recording predictable. When your routine is predictable, you waste less time second-guessing settings and more time creating.
Start with your script and your teleprompter app settings. Get the font size and margins right first, then dial the scroll speed. Next, lock your shot: camera height, framing, and exposure. Do a short test clip, listen to the audio quality, and then record in sections.
This routine works for YouTube and courses because it reduces pressure. You don’t need a perfect take. You need clean segments you can stitch together quickly.
A repeatable routine you can keep:
Most teleprompter issues feel “mysterious” until you know what’s causing them. The effective teleprompter setup isn’t the one that never has problems. It’s the one you can troubleshoot quickly.
If you see glare, it’s usually the lighting angle. If your eyes look like they’re darting, it’s usually the text size and margins. If your video shakes, it’s usually mounting and cable movement. And if your voice sounds flat, it’s usually script formatting and pacing
Quick fixes (use as a reference):
The best teleprompter setup for 2026 is the one you can rebuild quickly and trust every time you press record. It helps you deliver your message clearly, keep your eye line close to the lens, and finish filming without wasting time on constant restarts. Keep priorities simple: a stable mount, glare-controlled lighting, clean audio, and teleprompter app settings you can reuse instead of rebuilding from scratch.
A dependable setup also makes it easier to feel comfortable and confident on camera. When your shot is locked, pacing is steady, and your script is readable, you can focus on how you speak instead of what might go wrong. That shift shows up in the final video.
For your next session, pick one setup from this guide and treat it like a repeatable template. Run a quick pacing test, record in blocks, and save the settings that worked. If you want to put the full workflow into practice right away, you can start a free trial with Teleprompter.com and test it during your next recording session.
Keep your script conversational, increase font size, slow your scroll speed, and use margins so your eyes stay close to the lens. Record in blocks and do a 15-second test read to lock pacing before a full take.
Choose based on your camera and filming style: phone, desk/webcam, or DSLR/mirrorless. Prioritize stability, lens alignment, glare control, and enough screen space to read comfortably.
A repeatable A-roll workflow wins: stable framing, clean audio, glare-controlled lighting, and teleprompter app settings you can reuse. Record in blocks so pacing stays consistent across takes.
Use a stable mount, larger text, and a slower scroll speed. Keep the phone at eye level and adjust margins so your gaze stays close to the lens.
Yes. Camera-mounted teleprompters are common for DSLR and mirrorless creators. The key is stable mounting, centered lens alignment, and light placement that avoids reflections on the glass.
Increase font size, widen margins, and slow your scroll speed, then write scripts that sound like speech. Short lines and intentional pauses reduce eye movement and make delivery feel natural.
If you record often, it can save time by reducing retakes and keeping your message consistent. It’s especially useful for course creators and YouTubers who batch content and want a reliable workflow.


.png)